The IT Assets Database was replaced by the IT Admins CMDB and is EOL / End of Life, no further development will be done on this project.
Please follow the following instructions to install / configure the IT Assets database / IT Assets management system on your system. This is a rather easy and straight forward process, so don’t be afraid of the rather long and detailed write up here.
Before we begin:
Make sure you have a Microsoft Access 2016 x64 version installed on your system. If you don’t have the full version, you can download the free RunTime version from Microsoft here: https://www.microsoft.com/en-us/download/details.aspx?id=50040
Additionally you will need a Microsoft SQL 2008 R2 or newer SQL-Server installed somewhere within your system. This can be either a full version or a Express version that you download for free from Microsoft. The Express edition has limitations, in most cases you likely will not exhaust those limitations assuming you have not more then 10 users at the same time and not e.g. more then 10 GB of data, what would be quite a lot for this database.
Note: SQL (especially SQL Express) might be configured to not allow remote connections, respective connections through the network. Make sure any e.g. Windows Firewall settings are set correct (incoming for SQL Service e.g.) and that e.g. named pipes and TCP/IP are configured right on the SQL Service – SQL Configuration. If this is not the case, you might not be able to access the database from a remote client. You might be able to test this by using the Windows internal ODBC settings in Administrative Tools and try to connect to the database.
In any case – a proper backup is highly recommended. You should use SQL maintenance plans if you have a full version of Microsoft SQL, if you are using Microsoft SQL Express, you might want to have a look at my blog entry about SQL Express backups.
The following steps assume you have all you need and downloaded the IT Assets database already.
Extract the ZIP file
Please extract the ZIP file to C:\Temp\ITAssetsDB so that all the files and folders are in this path. It is not 100% necessary, but you are on the save side doing so. You can move it around later on while adjusting the paths. For the initial setup, I highly recommend this.
Restoring the database to your SQL system
Make sure the ITAssetsDB.bak file is accessible from your SQL Server. If you use a local SQL Express, you should not need to copy it around. The following steps guide you through the restore of the backup file to Microsoft SQL.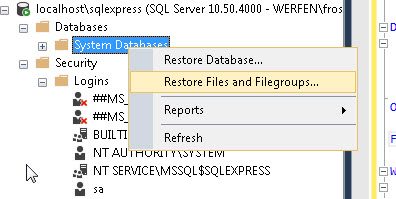
- Open the Microsoft SQL Management studio and connect to your SQL Server
- Right click on Databases and select Restore Files and Filegroups…
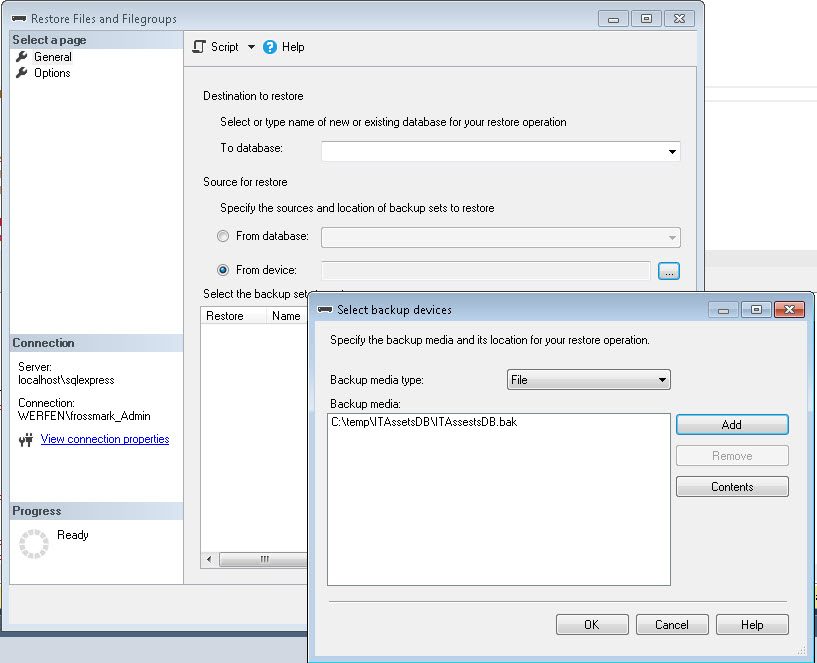
- Next you select From device and click the … button
- click on the Add button and select the ITAssetsDB.bak file
- close the select backup devices window
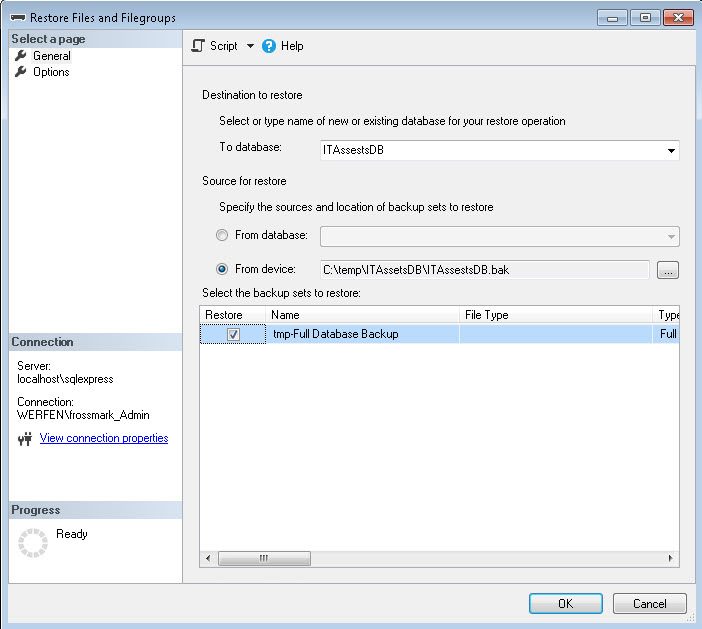
- Provide a database name in the To database field of the Restore Files and Filegroups dialog- per default you can use ITAssetsDB
- Check the box Restore for the selected file and click on OK to restore the database
- This should only take a few seconds.
Now you are basically done. You restored the database. To follow some best practice, I recommend you create a group in Active Directory that allows users to access the SQL database. Add your users to this group and give it access to the SQL database as indicated in the following steps.

- Navigate to Security of your SQL server – not the database
- right click and select New Login…
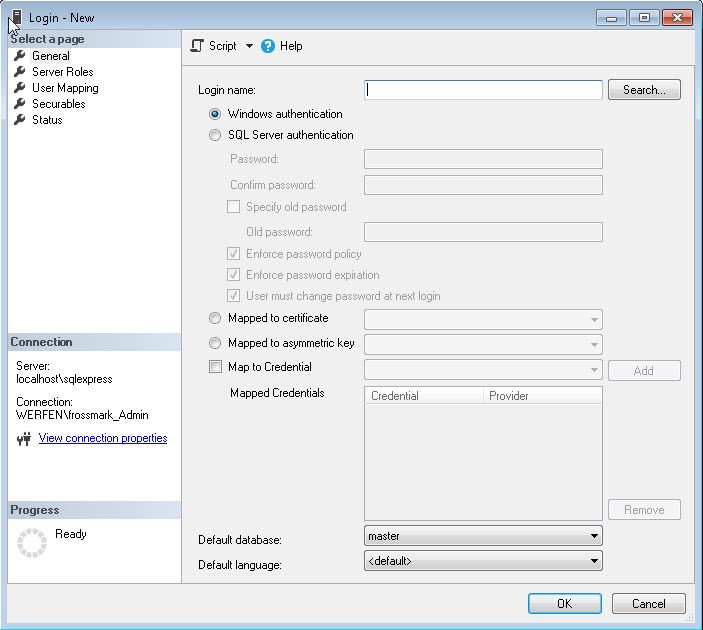
- Select your Active Directory group via the Search button
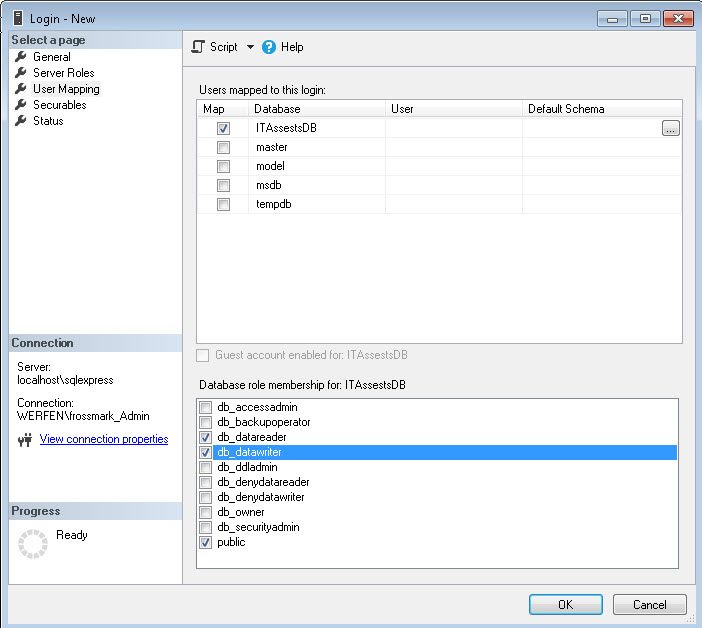
- navigate to User Mapping and map the new user to the database
- additionally check the boxes for db_datareader and db_datawriter
- and close the dialog with OK
The whole group should now be able to access the database.
Open the database and configure the system
Open the file IT_Assets_Program.accdb and follow the instructions to connect it to the SQL server. These are the following:
- The system will detect it is not configured and ask you for
- SQL server and instance
- enter the name of the SQL server or name and instance if you have installed a instanced name
- SQL express on a local system would be e.g. localhost\SQLExpress
- Database name on the SQL server
- this is the name you restore the database as on your SQL server


- this is the name you restore the database as on your SQL server
- SQL server and instance
- next it will try to connect to the SQL server – if everything went well, you should see a successfully connected message
- in case it did not went well – determine the root cause of your connection issues and try again
- have a look here for a rather common issue with not enabled client protocols and SQL server
- in case the database does act up, remove the IT_Assets_Program_DEV.accdb and copy the file IT_Assets_Program_DEV.accdb to a new IT_Assets_Program.accdb
- both files are identical in the beginning – you could simply retrieve it from the ZIP file again as well..
- this will make sure the process starts clean over in order to connect to your SQL server
- the startup process will create your Windows username in the database and give it full access rights
- further will it show a SysConfig form that you will need to adjust before you close it


- please follow the instructions in the table below for details to the SysConfig
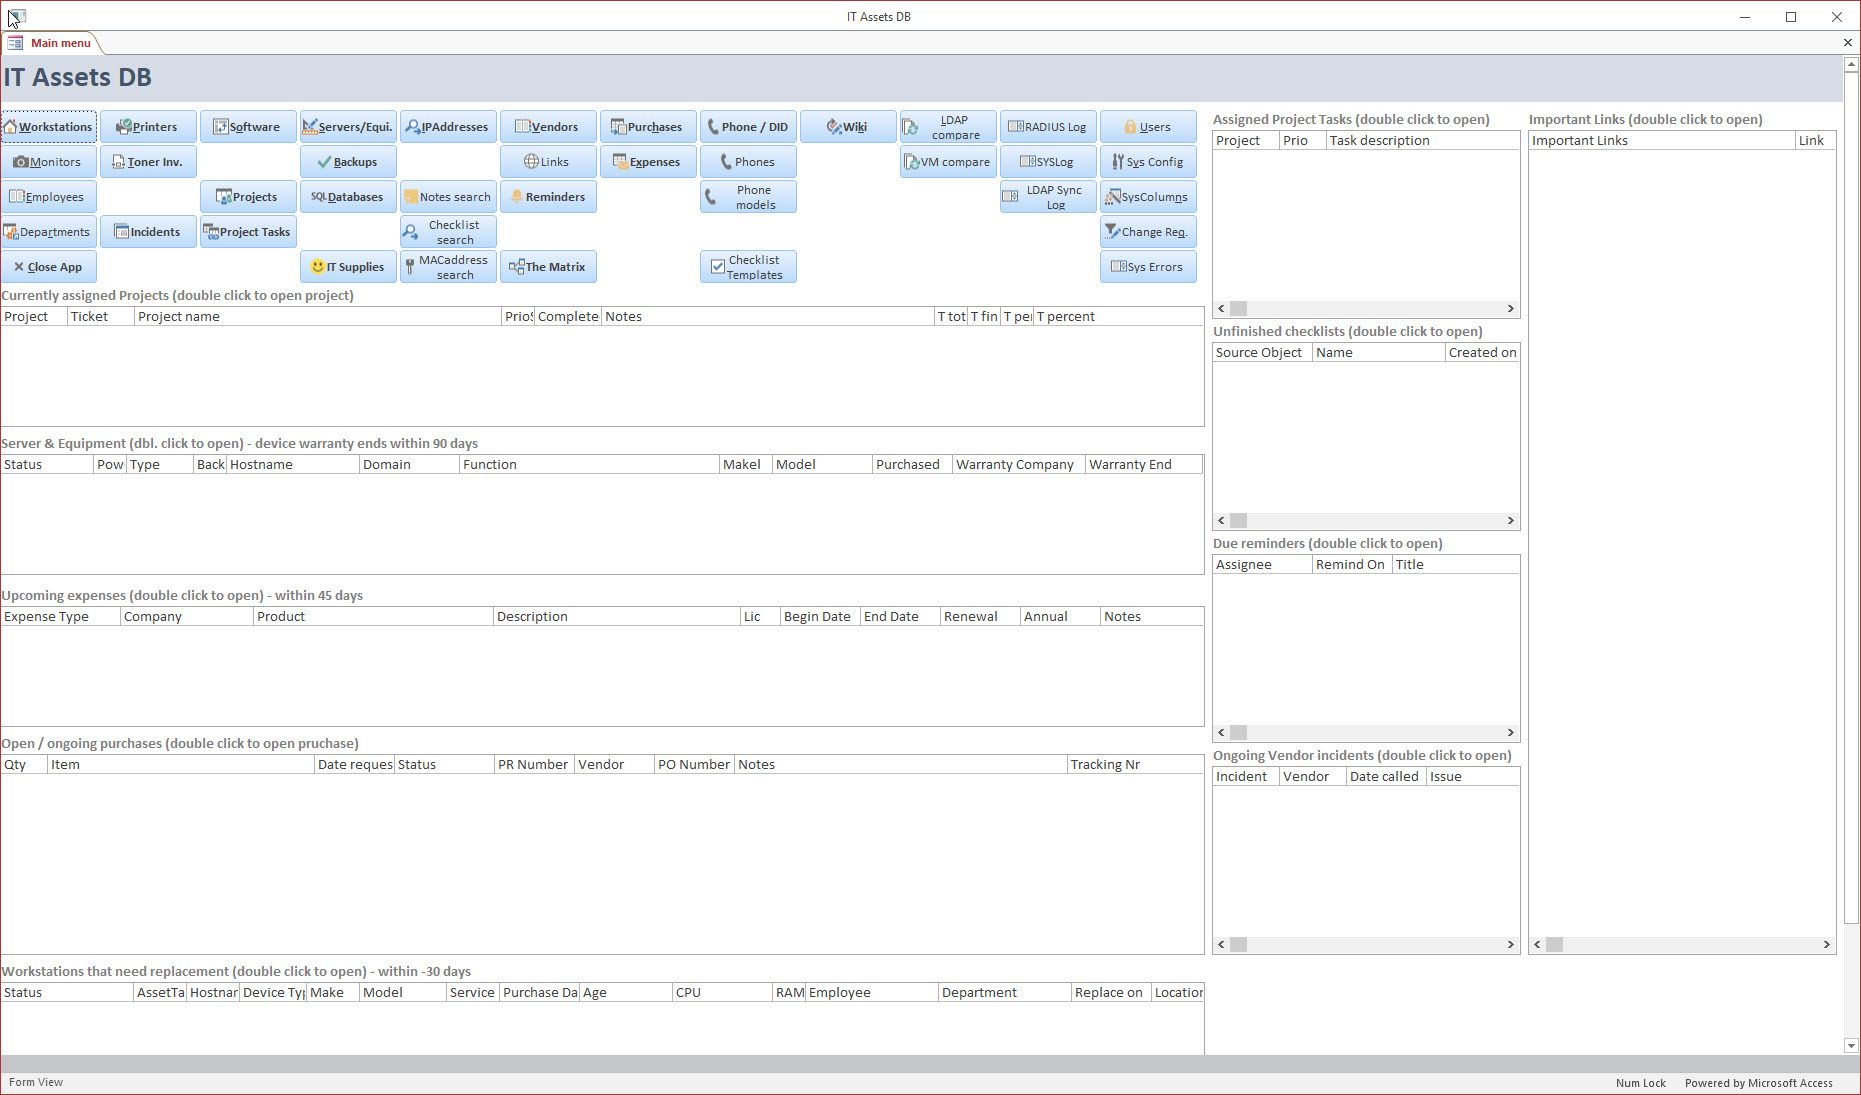
- once you close the SysConfig form, you are all set and the system will show you the Main menu – you are finished and you can start working with it
- Assuming your LDAP / Active Directory is configured right, I highly recommend following those steps as first act
- open LDAP Sync Log
- click on Force sync now
- Assuming your LDAP / Active Directory is configured right, I highly recommend following those steps as first act
- The system will detect it is not configured and ask you for
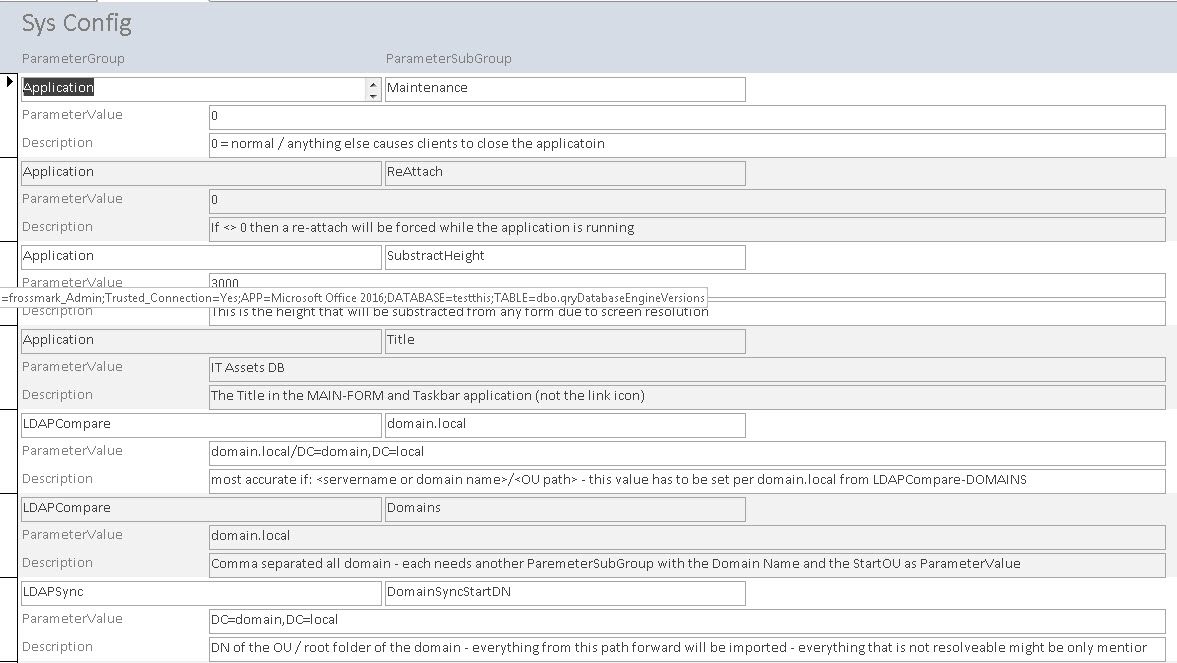
SysConfig
There are THREE absolute important configuration settings that are highlighted in ORANGE – the rest is a bit more relative and does not need attention right away.
Note: You might need to FIRST configure SQL– LogonDomain– this parameter is an absolute MUST for some internal functions in regards to the history function of the database on the SQL server.
| ParamaterGroup | SubParameterGroup | Explanation and instructions |
|---|---|---|
| SQL | LogonDomain | This is a MUST change value. Put your NetBIOS domain name here – like MYDOMAIN\ including the backslash |
| LDAPSync | DomainSyncStartDN | Put the distinguished name of the OU in your domain for which one users, groups and computer should be monitored. This actually will as well import your employees. E.g.: DC=mydomain,DC=local |
| Wiki | TempPath | Temp path to load/save PDF files for Wiki preview. See Wiki\LastCleanup on how to disable this while setting a future date. This is where temporary .PDF files will be generated. There is a auto-cleanup in the system that will forcefully remove any file in this path that does not have a current Wiki entry. By default, this means any file. Please set a absolute wrong path if you want to avoid this – if the path set here is accessible, the system will try to clean this folder out. Note: If you used the C:\temp\ITAssetsDB\WikiTemp from the ZIP file, nothing should happen. Just be aware that you set this path proper. You can even change it later to a central network location – it just cleans out temp file that are not needed any more. |
The full list of settings can be reviewed in the documentation here.
Note: It is almost essential that you configure the SMTP settings as well right away – failure to do so might cause a CDO error message showing up. This is due to wrong mail relay settings and the system trying to send out emails to you already.
User Rights
Due to various updates you might not have rights to everything. One of the first steps should be going to USERS and see that you have rights to all modules. The application needs to be closed and re-opened in order for rights to apply properly.
Rolling out the shortcut and database
You will further find a IT Asset DB shortcut file and a IT_Assets_Program_Start.vbs. The shortcut, once you put the application on a central network drive and path, please adjust the shortcut accordingly to the database file. Once you did this, you also want to open the IT_Assets_Program_Start.vbs file and adjust the paths in the upper section – mainly the SourceFile variable in line 11.
If you configured the shortcut to the IT_Assets_Program_Start.vbs and configured the script right as well, the following will be possible:
- anyone who double clicks the shortcut, e.g. on a central network path, will execute the VBscript
- the VBscript actually grabs the released version of the current Microsoft Access database file and copies it to the local workstation / temp directory
- it actually will try to delete any currently existing version locally in the temp directory
- it will prevent the user from double starting the application
- it makes sure the user always uses the latest version of the database application file / front-end
- due to simple Microsoft Access behavior, the Access file gets filled up with cache information etc. over time – while using a new copy every time the application is started, you make sure a clean version is in use
- links in the start menu and the desktop will be automatically created in addition to opening the application
- the VBscript makes sure Access 2016 will be in use while defining how the database front end will be opened
You might wonder about the IT_Assets_Program.accdb and IT_Assets_Program_DEV.accdb for more information about those two files, please refer to the developer information page. In short words, changes to the code should be made in the _DEV file, while the other one is always the file the users currently copy to their local workstation, it should be decompilled.
Please note: You do not have to use the shortcut at all – you can always just start the Access database file – but I highly recommend doing it via the VBscript and having local copies rather then starting the file e.g. through the network. Assuming you are not making code changes, it might be okay though.
Importing data
Every now and then I get the question, how do I import existing data in to the database. Well, there is no import module in there – you can export data for the most part, but since it is open source and free, there is no import module.
Personally, I always used just full-versions of Microsoft Access and used the Access internal features to import data to the tables from existing lists that I massaged so they would import as good as possible data. If I am not mistaken, even Microsoft SQL Server Studio allows you to do an import from various sources like CSV files or Microsoft Excel files.
If you really have questions about it, feel free to contact me – we then can talk about your specific challenge and how to best accommodate it.