Please follow the following instructions to install / configure the IT Printer Management system on your system. This is a rather easy and straight forward process.
Before we begin:
If you want to use the Access front-end, make sure you have a Microsoft Access 2016 x64 version installed on your system. If you don’t have the full version, you can download the free RunTime version from Microsoft here: https://www.microsoft.com/en-us/download/details.aspx?id=50040
You will need a Microsoft SQL 2008 R2 or newer SQL-Server installed somewhere within your system. This can be either a full version or a Express version that you download for free from Microsoft. The Express edition has limitations, in most cases you likely will not exhaust those limitations assuming you have not more then 10 users at the same time and not e.g. more then 10 GB of data, what would be quite a lot for this database.
In any case – a proper backup is highly recommended. You should use SQL maintenance plans if you have a full version of Microsoft SQL, if you are using Microsoft SQL Express, you might want to have a look at my blog entry about SQL Express backups.
Extract the ZIP file
Please extract the ZIP file to C:\Temp\ITPrinterManagement so that all the files and folders are in this path. It is not 100% necessary, but you are on the save side doing so. You can move it around later on while adjusting the paths. For the initial setup, I highly recommend this.
Restoring the database to your SQL system
Make sure the ITPrinterManagement.bak file is accessible from your SQL Server. If you use a local SQL Express, you should not need to copy it around. The following steps guide you through the restore of the backup file to Microsoft SQL.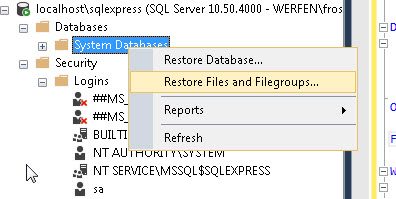
- Open the Microsoft SQL Management studio and connect to your SQL Server
- Right click on Databases and select Restore Files and Filegroups…
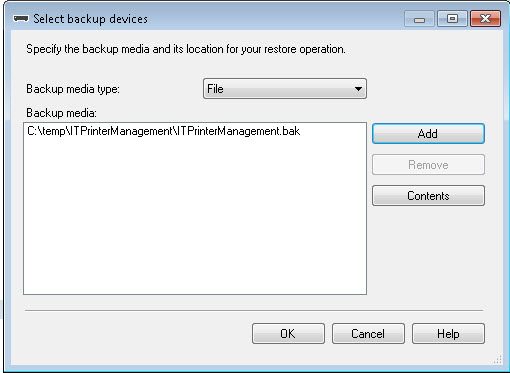
- Next you select From device and click the … button
- click on the Add button and select the ITPrinterManagement.bak file
- close the select backup devices window
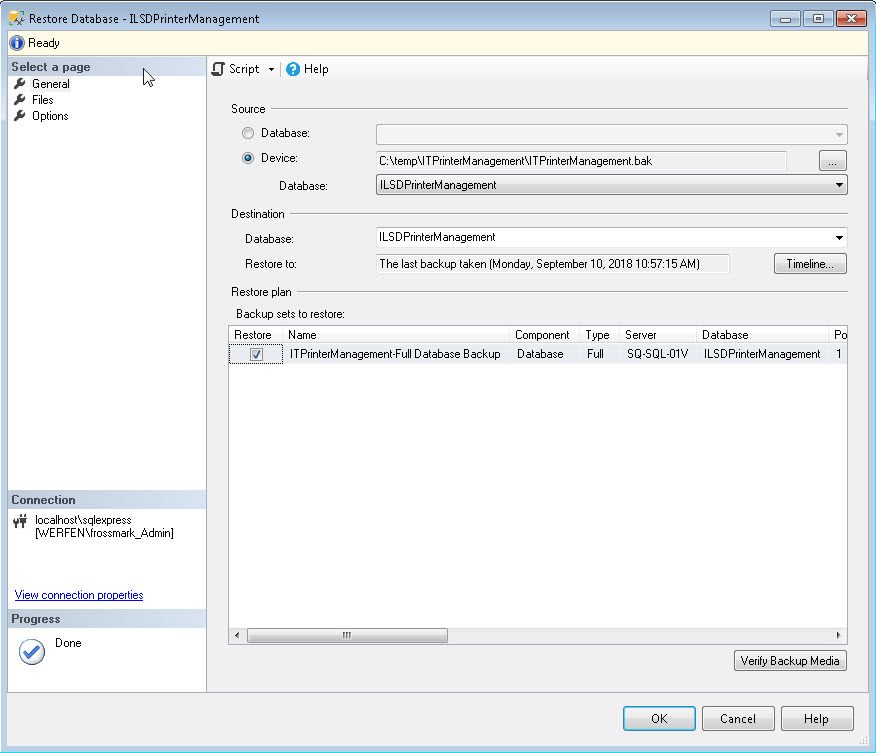
- Provide a database name in the To database field of the Restore Files and Filegroups dialog- per default you can use ITPrinterManagement
- Check the box Restore for the selected file and click on OK to restore the database
- This should only take a few seconds.
Now you are basically done. You restored the database. To follow some best practice, I recommend you create a group in Active Directory that allows users to access the SQL database. Add your users to this group and give it access to the SQL database as indicated in the following steps.

- Navigate to Security of your SQL server – not the database
- right click and select New Login…
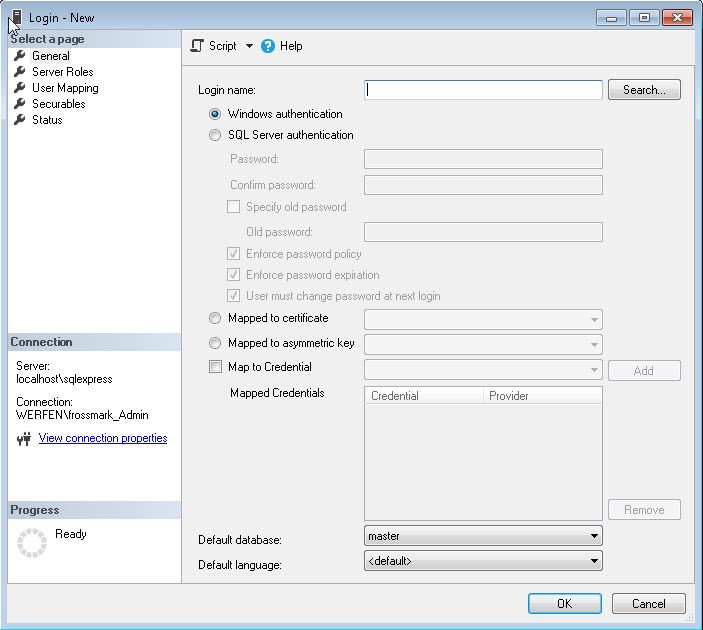
- Select your Active Directory group via the Search button – it is highly recommended to use DOMAIN USERS – you might need to adjust the object type filter in order to find a group
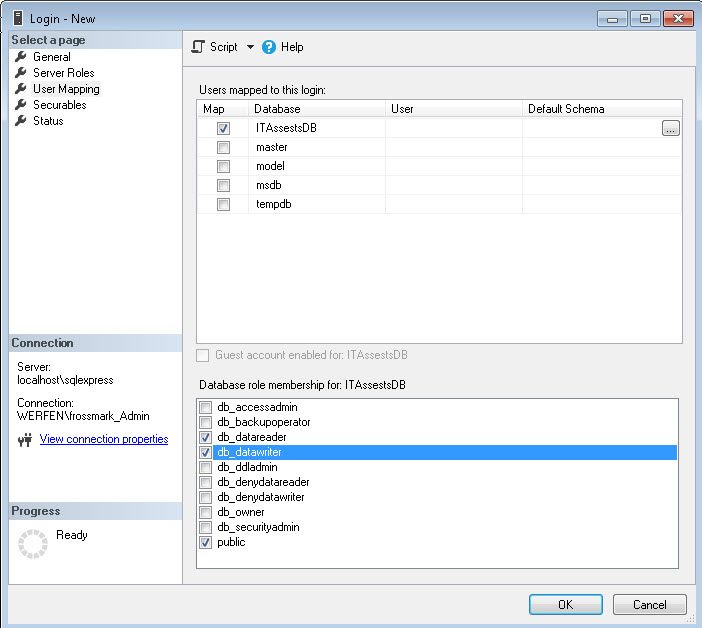
- navigate to User Mapping and map the new user to the database
- additionally check the boxes for db_datareader and db_datawriter
- and close the dialog with OK
The whole group should now be able to access the database.
Adjust the VBS script SQL server connection
This is needed in order to execute the VBS script right. Open the ITPrinterManagement.vbs in a text-editor like Notepad and adjust the following line to reflect your SQL-Server:
1 | Const SQLConnection = "Provider=SQLOLEDB.1;Server=servername\instanace;Database=ITPrinterManagement;Trusted_Connection=Yes;" |
Server=servername\instance should be adjusted to your servername or servername\instance – depending on if you used an instanced installation or not.
You can easily test the connection by executing the file – since you should have modified anything in the database yet, no network printers should be replaced or deleted in your current user profile.
Open the database and configure the system via the MS Access front-end
 Open the file ITPrinterManagementControl.accdb and follow the instructions to connect it to the SQL server. These are the following:
- The system will detect it is not configured and ask you for
- SQL server and instance
- enter the name of the SQL server or name and instance if you have installed a instanced name
- SQL express on a local system would be e.g. localhost\SQLExpress
- Database name on the SQL server
- this is the name you restore the database as on your SQL server
- SQL server and instance
- next it will try to connect to the SQL server – if everything went well, you should see a successfully connected message
- in case it did not went well – determine the root cause of your connection issues and try again
- have a look here for a rather common issue with not enabled client protocols and SQL server
- in case the database does act up, restore it again from the ZIP file
- this will make sure the process starts clean over in order to connect to your SQL server
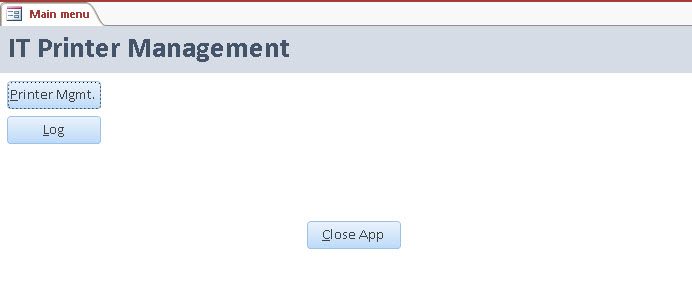
- if everything went well – you will see the main form like in the screenshot
- The system will detect it is not configured and ask you for